Marry Me Chicken Soup

Heyyyyy! Bite Me Canada Bite-ee’s!!! Well we are all settled in our winter home in sunny AZ now and my kitchen is open and cooking away. I’ve only had 1 dinner party so far..but there will be more. I made a dessert to take to a dinner party the other night..epic FAIL!!! It was an Eclair Cake and the pudding, which I made from scratch, never set up. It looked like a dogs breakfast. Pudding tasted fine..but it wasn’t supposed to be PUDDING…it was supposed to be a cake! So needless to say I did not post or take any pictures of that mess. But…THIS recipe – I’ve made it 2X in the past 3 weeks. It is amazeballs! So creamy, hearty and comforting. Full of flavor and comes together quickly, feeds a crowd. So go grab a rotisserie chicken and get busy in the kitchen. Make it, Bite it, thank me later.

#delicioushappenshere #funologyoffood #bitemecanada


Ingredients 🍄

The “stuff”…

  • 1 tbsp oil from sun-dried tomato jar
  • 1 onion, chopped
  • 4 garlic cloves minced, or 4 tsp jarlic (jarred garlic)
  • 3 tbsp tomato paste
  • 8 oz jar of sun-dried tomatoes, drained (save the oil for other things, its so good)
  • 2 32 oz cartons of good chicken broth
  • 1 cup heavy cream
  • 6 leaves, or more, fresh basil ( i measure basil with my heart) chopped
  • 2 tsp salt
  • 1 tbsp Italian seasoning (i used oregano)
  • 1 tsp garlic powder
  • 1/2 tsp red pepper flakes
  • 8 oz uncooked bow tie pasta
  • 3 cups chopped fresh baby spinach
  • 2.5 cups shredded rotisserie chicken
  • 8 oz cream cheese, cubed
  • 6 oz jar sun-dried tomato pesto
  • 1-2 tbsp soya sauce
  • 1/4 cup shredded Parmesan cheese, plus more for garnish before serving

Instructions 👩‍🍳

What to do with the “stuff”…

Heat oil from the sun-dried tomatoes in a large pot over medium heat. Add onions and garlic, cook 3-4 minutes until soft and fragrant. I LOVE the smell of garlic, I think it should be a perfume! Stir in tomato paste and sun-dried tomatoes, you can leave them chunky or cut them up, I cut them up so they didn’t look like huge red buttterflies floating on top of the soup..but you do you.

Add broth, cream, basil, salt, oregano, garlic powder and red pepper flakes. Bring to a boil and stir it occasionally…about 12 minutes.

Add pasta, reduce heat to medium and cook about 8 minutes until pasta is tender.

Lower heat and add in the spinach, chicken, cream cheese, parmesan, pesto, soya, stirring until the cream cheese melts, chicken is warmed through and spinach has wilted about 5-10 minutes.

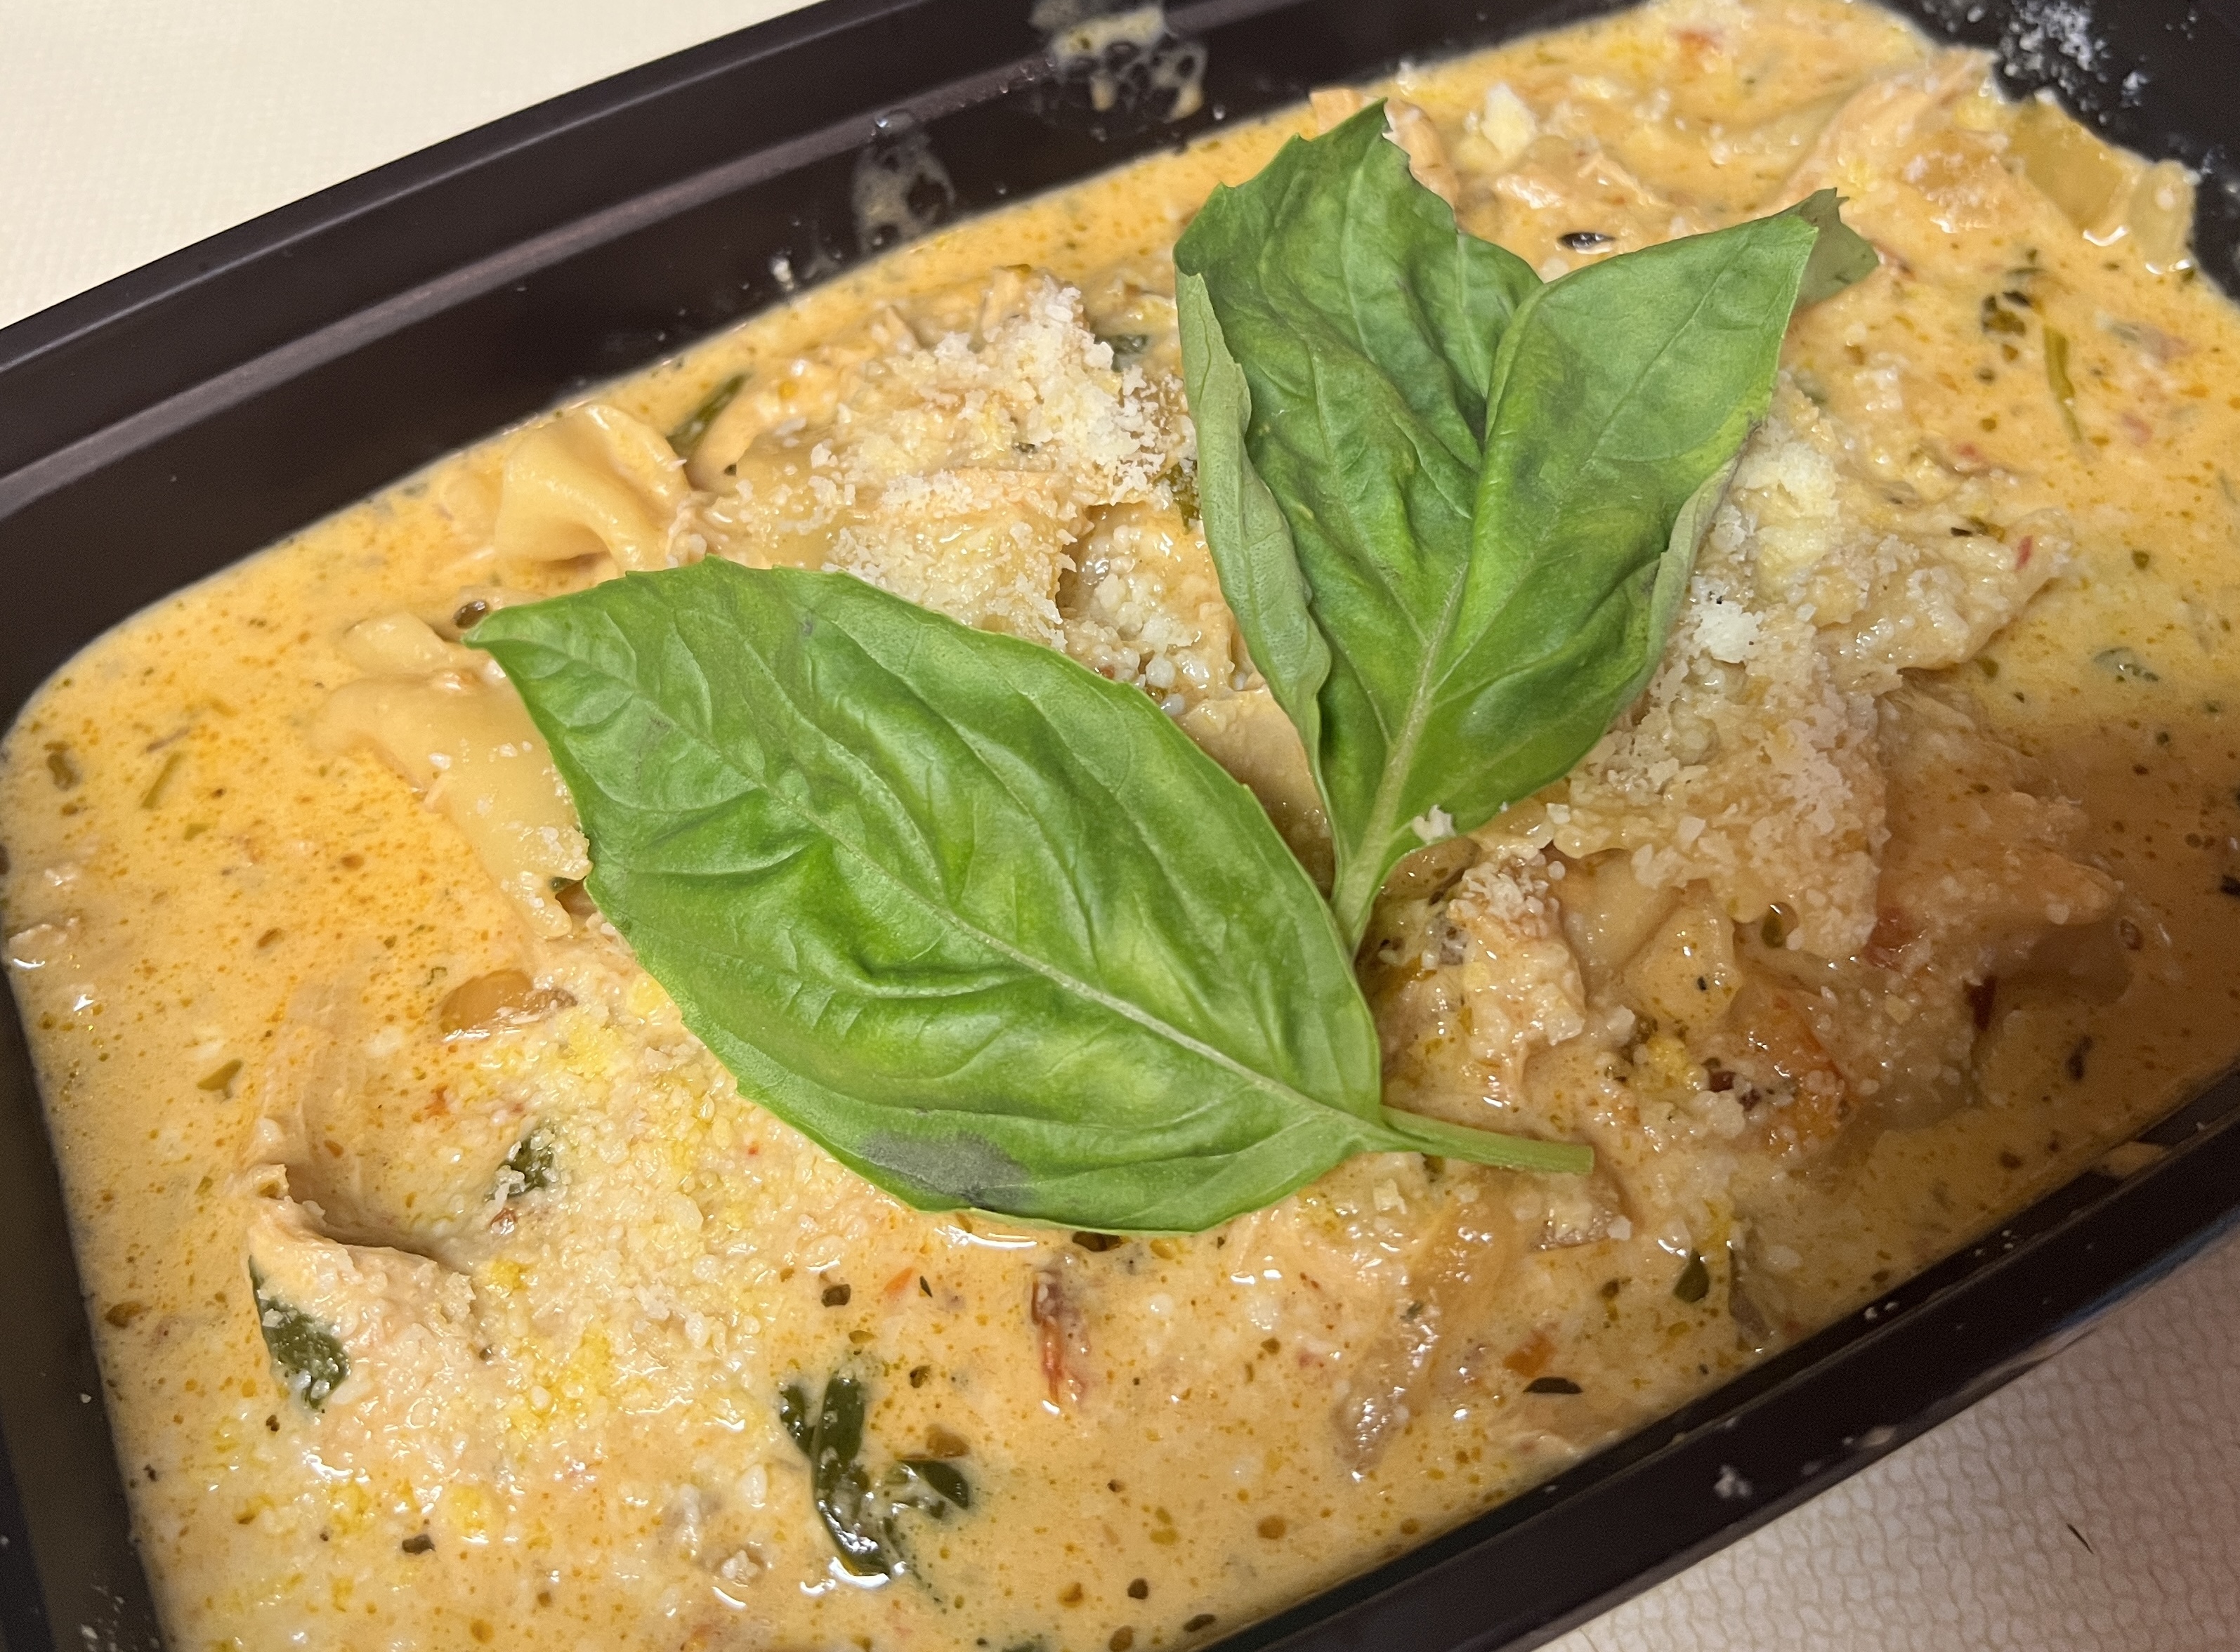
Garnish with extra basil and Parmesan cheese before serving if you’re fancy.

Don’t forget to sigh dramatically after your first bite, and tell everyone you slaved over it. 😉


Recipe Credit: Adapted from holleyinthekitchen (Instagram)

Notes

You can totally add whatever kind of veggies, protein you want to this soup too. Bacon and peppers would be a great addition too. Ideas are endless I tell ya! Bite Me!


Green Salad with Dill Dressing

Hey foodies! If you like salad and you like dill…this is a recipe for you! If you don’t care for either of these things…do not read any further- go make a cup of tea or something.

Now you need to do a couple of things ahead of time for this recipe like boil your eggs and cook your bacon so that it can all come together when your done making the dressing and prepping the salad.

The original recipe calls for Romaine lettuce but really use whatever kind of lettuce you like…I was going to do romaine and iceberg mix…but got lazy and just did iceberg…like come on..it just LETTUCE!!

The dressing is very fresh, it wasn’t quite salty enough for me so i added & tasted until it was great! Make this one…you won’t be mad at it.

#bitemecanada #funologyoffood #delicioushappenshere


Ingredients 🥞

The “Stuff”

  • 1/3 cup buttermilk (I seldom ever have buttermilk so I just make my own. 1 tbsp vinegar or lemon juice to each cup of milk, let it sit 10 minutes)
  • 1/2 cup sour cream
  • 1/3 cup mayo
  • 4-5 tbsp fresh dill, finely chopped (I’m sure I did more because I LOVE dill and I measure this herb with my heart)
  • 2 dill pickles, really finely chopped
  • 2 tbsp dill pickle juice
  • 1 tsp Dijon mustard (use whatever mustard you like, I did stoneground)
  • 1/2 tsp onion powder
  • 1/2 tsp ground black pepper
  • Salt to taste
  • Salad…
  • 1 head of Iceberg lettuce or 2 hearts of Romaine or whatever the heck kind of lettuce you like.
  • 8 slices of cooked bacon (duh!) chopped
  • 1/2 cup red onions, sliced or diced anyway you like
  • 2 dill pickles, thinly sliced
  • 4 hard boiled eggs, cut into halves or quarters or circles or whatever
  • Fresh dill and fresh ground black pepper for garnish if your fancy

Instructions 👩‍🍳

Place all your dressing ingredients into a bowl and whisk them together until well blended and creamy. Taste to see if you need to add more seasonings. Put into fridge until ready to serve it.

Cut the lettuce any way you want, it did mine in thin strips and then cut them across..but you do you. Put lettuce into a large salad bowl. Add rest of ingredients on top of lettuce except for eggs and toss well. Now get fancy and place you eggs on top and garnish away.

Serve with the dill dressing. If you have left over dressing, it’ll keep in fridge for another 3-4 days.


Recipe Credit: theeastcoastkitchen.com

Mushroom Risotto (Instant Pot)

Heyyyyy! I’m posting AGAIN!! Two in a row! 😂
Guess I need to get a life, eh? Never mind… like I said before — don’t get used to it!

If you’ve got an Instant Pot, you HAVE to make this Mushroom Risotto. 🍄
Well… I guess you’d also HAVE to like mushrooms too 🙄 — but if you do, this recipe is pure comfort in a bowl.

It’s creamy, savory, rich, and downright luxurious without all the stirring you’d usually do for risotto.
And if you’re lucky enough to have leftovers? Fry up an egg and plop it on top the next morning. Boom. Breakfast of champions. 🍳

If you don’t have an Instant Pot… I got nothing for you here. Move along to another Bite Me Canada recipe please 😶.

Make this. Bite this. You’ll thank me later.

#delicioushappenshere #funologyoffood #bitemecanada


Ingredients 🍄

The “stuff”…

  • 2 Tbsp extra-virgin olive oil
  • 1 lb mushrooms, trimmed & sliced
  • Salt & pepper, to taste
  • 1 medium onion or shallot, chopped (I prefer shallot — it’s classier)
  • 2 cups arborio rice
  • ½ cup white wine or vermouth
  • 4½ cups chicken stock
  • ¼–½ cup grated Parmesan cheese
  • ¼ cup chopped fresh parsley
  • 2 Tbsp butter (just before serving — because we’re fancy like that)

Instructions 👩‍🍳

What to do with the “stuff”…

  1. Set your Instant Pot to Sauté and pour in the olive oil.
  2. Add mushrooms and cook, stirring, until any moisture evaporates and they start to brown. Season with salt and pepper.
  3. Add onion or shallot and sauté until translucent, about 8 minutes.
  4. Stir in the arborio rice and cook for about 3 minutes.
  5. Pour in the wine or vermouth and cook until mostly evaporated, about 3 minutes.
  6. Add the chicken stock, give it a good stir, then lock the lid in place.
  7. Make sure the steam valve is set to Sealed. Select Manual and set it for 5 minutes on High Pressure. (It’ll take about 10 minutes to build pressure before it starts cooking.)
  8. When done, turn off the cooker, Quick Release the steam, and remove the lid.
  9. Stir it with a wooden spoon — it’ll look a little “liquidy” at first, but trust the process.
  10. Add parsley, Parmesan, and more salt & pepper to taste.
  11. Just before serving, stir in butter — because, you know… we’re fancy like that.

Serve hot, sigh dramatically after your first bite, and tell everyone you slaved over it. 😉


Notes 📝

  • Use a mix of cremini and white mushrooms for extra flavor.
  • Leftovers reheat beautifully — or enjoy them with a fried egg on top for breakfast.
  • If you want it cheesier, just keep grating that Parmesan like it’s your cardio.

Recipe Credit: Adapted from epicurious.com

Teriyaki Chicken Thighs

Hey people!! 👋
I’m posting!!! I know, I know… it’s been forever! But listen — I’ve been busy. Birthdays, company, grandbabies… you name it.

Don’t think I haven’t been cooking though. I’ve been cookin’ — I just haven’t been postin’. 😅

But I had a dinner party the other night and made these Teriyaki Chicken Thighs, and let me tell you — they were soooo biteable! 🍗

I always prefer skinless, boneless thighs — they never let me down. This sauce is quick, pantry-friendly, and ridiculously delicious. You’ve probably already got everything you need just hangin’ out in your kitchen.

I served it with my Instant Pot Mushroom Risotto (yes, I’m posting that next — what?! Two posts in a row? Don’t get used to it, people! 😂).

Give this one a go. You’ll love it. Make it, bake it, BITE it! ❤️

#delicioushappenshere #bitemecanada #funologyoffood


Ingredients 🍗

The “stuff”…

  • 2 Tbsp cornstarch
  • 1 Tbsp cold water
  • ½ cup brown sugar
  • ½ cup soy sauce
  • ¼ cup vinegar
  • 1 tsp garlic powder
  • 1 tsp powdered ginger (or fresh if you’re fancy)
  • ¼ tsp pepper
  • 12 boneless, skinless chicken thighs
  • Green onions, sliced
  • Sesame seeds, for garnish 😉

Instructions 👩‍🍳

What to do with the “stuff”…

  1. In a saucepan, whisk together all sauce ingredients: cornstarch, water, brown sugar, soy sauce, vinegar, garlic powder, ginger, and pepper.
  2. Bring to a boil, stirring constantly, until sauce thickens and sugar dissolves. (It’ll look thick now, but don’t worry — it thins out while baking.)
  3. Pour a bit of the sauce into the bottom of your baking pan.
  4. Add the chicken thighs on top — snugly, but try not to overlap too much.
  5. Pour the remaining sauce over the chicken and flip each piece once to coat fully.
  6. Bake uncovered at 350°F for 1 hour, turning halfway through.
  7. Garnish with sesame seeds and sliced green onions before serving.

Then… bite them! 😋


Notes 📝

  • I doubled this recipe because I had lots of thighs and wanted extra sauce — highly recommend.
  • You can make this in advance — just reheat gently so the sauce stays glossy and perfect.
  • Pairs beautifully with rice, noodles, or that Instant Pot Mushroom Risotto I mentioned.

Recipe Credit: Bite Me Canada

Hamburger Stroganoff

Holla people! ☀️
What. A. Gorgeous. Day. here on the West Coast — it feels like summer already!

I love Sundays… they’re my favorite day of the week. I had planned a different meal for tonight (which I’ll post another day), but when I went to grab my potatoes from the potato box… they were soft and mushy. 🤢
So… plan B!

Enter this quick, hearty, and absolutely delish Hamburger Stroganoff. 🍝
My hubby LOVES ground beef — he’d eat it every night if I let him… but I do not! 😂

This recipe is fast, creamy, and comfort in a bowl. Bonus — it makes a ton, so you’ll have “still-here’s” tomorrow (aka leftovers!) and won’t have to cook. 🙌

Make it. Bite it. Love it.

#funologyoffood #bitemecanada #delicioushappenshere


Ingredients 🍄

The “stuff”…

  • 1 pkg egg noodles (12 oz)
  • 1 small yellow onion, diced
  • 2 Tbsp butter
  • 2 lb lean ground beef
  • 3 Tbsp all-purpose flour
  • 1 tsp garlic powder
  • 1 tsp smoked paprika
  • ½ tsp fresh ground pepper
  • 1 pkg onion soup mix
  • 2 cups beef broth
  • 1 can cream of mushroom soup
  • 1 Tbsp fresh minced dill
  • 1 cup sour cream
  • Salt and pepper, to taste
  • 6 oz fresh sliced mushrooms (optional, but amazing)
  • Diced dill pickles
  • Red pepper flakes (if you’re fancy like that)

Instructions 👩‍🍳

What to do with the “stuff”…

  1. Bring a large pot of water to a boil. Add noodles and cook according to package directions. Drain and set aside.
  2. In a large skillet, melt butter over medium-high heat. Add diced onion (and mushrooms, if using). Sauté until soft and translucent. Remove from the pan and set aside.
  3. Add ground beef to the same skillet. Cook and crumble until browned, then drain any excess grease.
  4. Sprinkle flour over the beef, then pour in the beef broth. Stir and cook until thickened.
  5. Add onions, mushrooms, and all the seasonings back into the skillet. Stir for about 1 minute to combine.
  6. Gently stir in sour cream. Taste and season with salt and pepper.
  7. Simmer on low for 10–15 minutes until creamy and heated through.
  8. Add cooked noodles to the sauce OR serve sauce over noodles — whatever makes your heart happy. ❤️
  9. Top with diced dill pickles and a sprinkle of red pepper flakes.

Serve hot. Then… BITE IT!!


Notes 📝

  • The dill pickles are the secret twist — don’t skip ‘em!
  • Use ground turkey or pork if you want to switch it up.
  • This dish reheats beautifully — just add a splash of broth or milk before warming.

Recipe Credit: Bite Me Canada original

Beer, Butter, Bacon Wrapped Cabbage (BBB Cabbage)

Hey y’all! 🥬🍺🥓
So there’s this Facebook page I follow — “Cookin’ Cuttin’ Up & Ceepin’ It Real” — and they posted this recipe that I just had to try.

It’s called Beer, Butter, Bacon Wrapped Cabbage (aka BBB Cabbage).
And let me tell you — it was AMAZEBALLS y’all!! 🤯

Even people who don’t like cabbage… liked this cabbage.
I mean seriously, how could you not when there’s beer, butter, and bacon all having a party together?!

You do need to plan ahead — this baby cooks low & slow — but it’s worth every second.
Make it once, and you’ll be a rock star. 🌟

Bonus tip: The next day, I fried up the leftovers with a few fresh shrimp — because, well… I’m fancy like that. 😎🍤

Make it. Bite it. Love it.

#bitemecanada #funologyoffood #delicioushappenshere


Ingredients 🥓

The “stuff”… (per cabbage head)

  • 1 large head of cabbage (or 2 small), scored into checkerboard cuts (not cut all the way through)
  • ¼ cup butter, sliced into patties (freeze first for easy cutting)
  • 1 tsp salt
  • 1 tsp pepper
  • ½ tsp red pepper flakes
  • 1 sliced onion
  • 2 cloves garlic, sliced thin
  • ½ can of beer (whatever you’re drinking works fine!)
  • 6 slices bacon

Instructions 👩‍🍳

What to do with “the stuff”…

  1. Line a roasting pan with heavy-duty foil — one long piece lengthwise, another crosswise.
  2. Wash the cabbage, then cut it into checkerboard slices (about 6 cuts). Don’t cut all the way through.
  3. Push butter slices down into all the cuts.
  4. Scatter sliced onions and garlic over the top.
  5. Sprinkle with salt, pepper, and red pepper flakes.
  6. Crisscross the bacon strips right over the top — give it that fancy bacon weave look.
  7. Pour beer over the cabbage head.
  8. Pull all the foil up around the cabbage, sealing it tightly so the beer stays in.
  9. Roast in a 325°F oven for 2½–3 hours.
  10. Open the foil, remove the cabbage stem, and run a fork through to distribute all that buttery, bacony goodness.

Notes 📝

  • Serve hot, with a crusty roll or alongside roast chicken or pork.
  • Leftovers? Slice it up and fry it with shrimp or sausage — unreal!
  • If you’re cooking multiple cabbages, just multiply the “stuff” per head.

Recipe Credit: Adapted from Cookin’ Cuttin’ Up & Ceepin’ It Real

Baked Buffalo Wings

Hey y’all! 🌞
Gorgeous sunny weather here on the West Coast this morning! But let me tell you — our house is a hot mess.

We’ve got a leak in our upstairs bathroom sink, and it’s turned the main floor into a wind tunnel with two industrial fans and a dehumidifier roaring 24/7. It’s like living in an airport hangar! ✈️

We’ll be moving out soon for plumbing, drywall, and floor replacements… but I’m already looking forward to the “new” and “quiet” home when we return.

BUT! I am still cookin’ — because that’s what I do.
I cook, and I know stuff. That’s my superpower. 💪🍗

So last night I whipped up these Baked Buffalo Wings — and they are now my new go-to for all things Buffalo. So buttery, not too spicy, and absolutely finger-lickin’ perfect.

And if you do find them spicy (looking at you, Sharon 😘), just dip ‘em in Ranch! Or… dip ‘em in Ranch anyway. Because why not?

Make them, Bite them, and thank me later.

#delicioushappenshere #bitemecanada #funologyoffood


Ingredients 🍗

The “stuff”…

  • ¾ cup all-purpose flour
  • ½ tsp cayenne pepper
  • ½ tsp garlic powder
  • ½ tsp salt
  • 20 chicken wings (I had 26 — flatties & drummies, of course)
  • ½ cup melted butter
  • ½ cup hot pepper sauce (Frank’s RedHot all the way!)

Instructions 👩‍🍳

What to do with “the stuff”…

  1. Prep: Line a baking sheet with foil or lightly grease it with cooking spray.
  2. Coat: In a large resealable bag, combine flour, cayenne, garlic powder, and salt. Add wings, seal, and toss until well coated.
  3. Chill: Place wings on the baking sheet and refrigerate for at least 1 hour — I did 2 hours because I’m fancy like that 🥴. 💡 Pro tip: This makes the flour coating sticky so the sauce clings perfectly. Don’t skip this step!
  4. Sauce: Preheat oven to 400°F (200°C). Whisk together melted butter and hot sauce in a small bowl.
  5. Bake: Dip wings in the butter mixture, return to the baking sheet, and bake for 25 minutes. Flip wings, crank oven to 425°F, and bake another 25 minutes until crispy and golden.
  6. Serve: Plate ‘em up, grab your Ranch (or blue cheese if you’re fancy), and Bite them!

Notes 📝

  • Want extra saucy wings? Double the butter/hot sauce mix.
  • These reheat like a dream in the air fryer.
  • Perfect for game day, Friday nights, or when you just need to feel like a snack legend.

Recipe Credit: Adapted from allrecipes.com

Roasted Corn Salad with Cilantro Lime Dressing

Morning y’all! 🌽☀️
Day after Easter Sunday — kids got sugar hangovers? 😅

We skipped the traditional Easter dinner this year. I was thinking turkey… until my daughter Jonie said she’s not that crazy about turkey.
I said, “WHAT?! I thought you loved turkey!” 🤯
WOW — you think you know someone, eh?!

So instead, we had Chicken & Shrimp Jambalaya, this Roasted Corn Salad, Garlic Bread, and Chocolate Macaroon Pie… that’s all 🐥.

And let me tell you — this Roasted Corn Salad was insanely delish! 🌶️
Colorful, fresh, bursting with flavor — and the Cilantro Lime Dressing? BOOM 💥 flavor bomb!
If you don’t like corn… move along. Nothing for you here.
But if you do — make it, bite it, swoon 🥴

#bitemecanada #funologyoffood #delicioushappenshere


Ingredients 🥗

The “Stuff”…

  • 4 ears corn, husks removed (or 2 bags frozen roasted corn from Trader Joe’s, thawed & sautéed in EVOO)
  • 1 Tbsp olive oil
  • Salt & black pepper, to taste
  • ¾ cup diced English cucumber
  • ½ cup diced red bell pepper
  • ½ cup cherry tomatoes, quartered
  • ½ cup diced avocado
  • ½ cup diced red onion
  • 1 garlic clove, minced
  • 1 Tbsp minced jalapeño (I used “tamed” jarred ones — love them!)
  • 1 Tbsp cilantro, plus more for garnish
  • 2 Tbsp roasted salted sunflower seeds

Cilantro Lime Dressing (aka “slather-worthy” sauce)

  • ¼ cup extra virgin olive oil
  • ¼ cup chopped cilantro
  • 2 Tbsp chopped mint
  • 2 Tbsp apple cider vinegar
  • 1 Tbsp lime juice
  • Zest of one lime
  • 1 tsp honey (or 1 Tbsp sweet chili sauce if you’re out — that’s what I did!)
  • 1 garlic clove, minced
  • ⅛ tsp kosher salt
  • Black pepper, to taste

Instructions 👩‍🍳

Corn Salad:

  1. Grill method (for the fancy folks): Grill 4 ears of corn, cool, then cut off the kernels.
    (Bonus workout chasing kernels across the counter & floor!)
  2. Shortcut method (my fave): Use Trader Joe’s roasted corn or any frozen kind. Sauté in a bit of EVOO.
  3. Dice up all the veggies — I went heavier on them, closer to 1 cup each, and used a full medium red onion.
  4. Mix everything together in a big bowl.
    • If making ahead: wait to add avocado & sunflower seeds until just before serving (to keep it pretty & crunchy).

Dressing:

  1. Toss all ingredients into a blender and blend until smooth.
  2. Taste test — adjust to your liking!
    • I added more sweet chili sauce to balance the lime.
  3. Pour over salad just before serving.

Top with extra cilantro & sunflower seeds.
Devour. 😍


Patsi’s Ponderings 💭

This salad works warm, cold, or room temp.
Add a protein if you like — or don’t — it’s a meal by itself.
Next time, I’m topping it with crunchy bacon… because I’m fancy like that. 🥓✨

Jonie took the rest of the salad home.
I have the dressing 🙄
BITE ME!! 😘


Recipe Credit: Adapted from carlsbadcravings.com

Shrimp A La Bang Bang (Air Fryer)

Hey everybody!! 👋
I am POSTING!! Can you believe it? I know… it’s been months! No excuses really, I just haven’t posted 🥴.

But I’m finally back home in Canada after five glorious months down in Arizona living my best “snowbird” life ☀️🐦. Did lots of cooking, entertaining, and posting pics on Facebook — just not on my Bite Me page (I know, I know… I’ll smarten up 😆).

Anyway — here’s a delish one I made the other night for weekend company. If you don’t have an air fryer, no problem — just cook these in your ordinary, boring oven 😂.

They’re a bit piddly to prep, but totally worth it! If you buy shrimp with the tails on, you can just grab the tail and flop both sides of your shrimp down into the Panko after dipping them in the mayo mix — easy peazy!

They’re crunchy, spicy, and ridiculously good. So make ‘em & Bite ‘em ❤️

#bitemecanada #funologyoffood #delicioushappenshere


Ingredients 🍤

The stuff…

  • ½ cup mayonnaise
  • ¼ cup sweet chili sauce
  • 1 Tbsp sriracha (or more if you like it HOT 🔥)
  • ¼ cup all-purpose flour
  • 1 cup panko breadcrumbs
  • 1 lb raw shrimp, peeled and deveined (tails on makes it easier)

Instructions 👩‍🍳

What to do with the stuff…

  1. Set air fryer to 400°F (200°C) — no need to preheat.
  2. Mix mayo, chili sauce, and sriracha in a bowl until smooth.
    • Reserve some sauce in a separate bowl for dipping (trust me, you’ll want it!).
  3. Place flour on one plate and panko on another.
  4. Coat shrimp in this order: flour → mayo mixture → panko.
  5. Place coated shrimp on a baking sheet (to keep things tidy).
  6. Transfer shrimp to the air fryer basket, no overcrowding!
  7. Cook 6 minutes per side, spraying lightly with coconut oil if desired.
  8. Serve hot with extra bang bang sauce on the side.

Notes 📝

  • These are crisp, spicy, and totally addictive.
  • Perfect for weekend company, appetizers, or “I deserve something fancy” nights.
  • If using the oven, bake at 425°F for 12–15 minutes, flipping halfway through.

Recipe Credit: allrecipes.com + Bite Me Canada

White Chicken Enchiladas (Pioneer Woman Inspired)

Hey y’all! 👋
Hope everyone’s doing well and good!

I had one of my long-time girlfriends from “school days” come visit the other day. She and her hubby are down vacaying in Scottsdale, so they trekked over to our place in Surprise for lunch and a visit. We had a GRAND time — and who knows, maybe I convinced them to buy a winter home down here too 😉

I made White Chicken Enchiladas for the first time ever — but that is officially a thing of the past! This Pioneer Woman recipe is now in the regular rotation because it was sooooo DELISH! 🌶️

And you know me — I love a little crunch in my bites, so I added a can of diced water chestnuts (yes, they sell them diced here in AZ!). That creamy cheese sauce poured over top? Forget about it. It’s like a rich béchamel — dreamy, silky, and ridiculously flavorful.

Served it with coleslaw on the side (because refried beans 🤢 are just not my thing — but you do you). Mexican rice would also be a hit!

#bitemecanada #funologyoffood #delicioushappenshere


Ingredients 🌮

The “stuff”…

  • 2½ cups cooked, shredded chicken (I used rotisserie — EASY!)
  • 2 cups chicken broth
  • 3 Tbsp canola oil
  • 12 corn tortillas (small)
  • 1 large onion, diced
  • 3 cans (4 oz each) diced green chilies
  • 1 jalapeño, seeded and finely diced (I used tamed jarred ones)
  • 1 can diced water chestnuts (for crunch!)
  • 2 tsp minced garlic
  • 1 tsp paprika (I used smoked)
  • ½ cup heavy cream
  • 2 Tbsp butter
  • 2 Tbsp flour
  • 1 cup sour cream (+ more for serving)
  • 2½ cups Monterey Jack cheese, grated
  • Salt and pepper, to taste
  • Salsa (optional)
  • Chopped cilantro

Instructions 👩‍🍳

What to do with the “stuff”…

  1. Prep tortillas: Heat 2 Tbsp canola oil in a small skillet over medium-high. Lightly fry tortillas for no longer than 20 seconds (just to soften). Drain on paper towels.
  2. Make filling: Heat 1 Tbsp oil in another skillet. Add onion and jalapeño; sauté 1 minute. Add chicken, half the green chilies, water chestnuts, garlic, and ½ tsp paprika. Stir in ½ cup chicken broth and the heavy cream. Let bubble and heat through. Remove from heat.
  3. Make sauce: In a large saucepan, melt butter and whisk in flour. Cook 1 minute. Gradually whisk in 1½ cups broth. Stir and cook until slightly thickened. Add remaining chilies, sour cream, and 1½ cups cheese. Stir until melted and smooth. Season with ½ tsp paprika, salt, and pepper.
  4. Assemble: Spoon a couple tablespoons of chicken mixture and a pinch of cheese into each tortilla. Roll up and place seam-side down in a 9×13″ casserole dish.
  5. Pour cheese sauce over top, sprinkle with extra cheese (because, duh).
  6. Bake at 350°F for 30 minutes until bubbly and golden.
  7. Sprinkle generously with chopped cilantro.

Serving Suggestions 🍽️

Serve with salsa and sour cream if you’re fancy (like me 🙃).
Then faint. Swoon. Bite them again and again. 😋


Recipe Credit: Adapted from Pioneer Woman Recipes

Blog at WordPress.com.

Up ↑